- Home Old school pinball <1985
- Grand Prix (EM) 1976
- Firepower (SS) 1980
- Space Mission (EM)1976
- Genie (SS) 1979
- Magic Castle (SS) 1984
- Black Knight (SS) 1980 New school pinball >1985
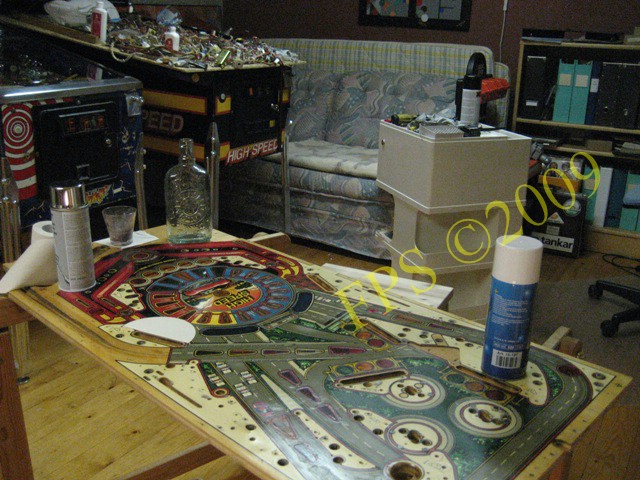
- High Speed (Sys11) 1986
- Earthshaker (Sys11) 1989
- CFTBL (WPC) 1992 Arcade Project
- JK-Cabinet with MAME Contents High Speed
- Playfield Refurbishing
- Playfield Painting
- Playfield Re-build
- Before-After Pictures
- Refurbishing Diary
- Finished project
- Dokument - Flyer
|
Language |
|
|
Williams High Speed Refurbishing Project - Part II!
PAINT TOUCH UPS AND REFURBISHING OF PLAYFIELD
 |
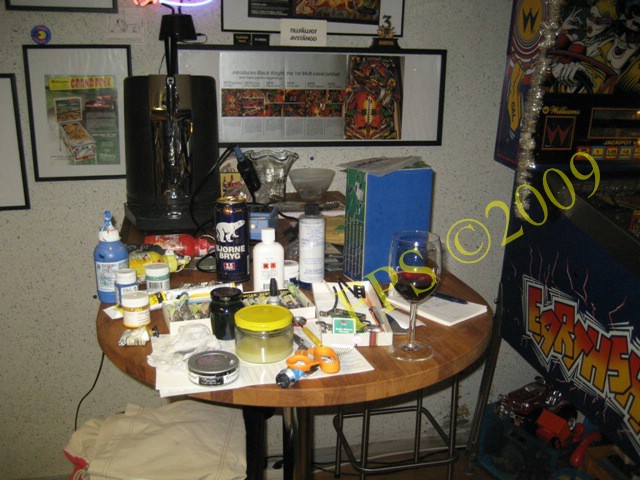 |
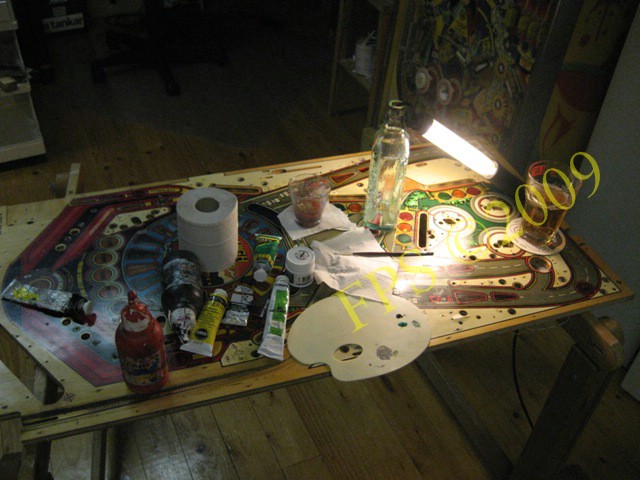
Two pictures when I work with paint touch-up of the playfield.
The reason I believe that one should do paint touch ups of a damage or wear on the playfield even if they result are not entirely perfect is that it is better than to leave the areas on the playfield with clean wood. If the paint touch ups are not quite perfect this will usually not be detected by a viewer or player, but a damage or wear in the playfield where there are no motives or colors will be far more conspicuous and in some cases also affect the play negative.
Mylar, glue from mylar
REMOVING GLUE RESIDUALS
Glue residuals from original mylar on the playfield, when the glue has started to dry it is nasty to remove from the playfield. I will try to show how I proceed to remove the glue without making damage to the surface of the playfield.
I start to apply Label-off to dissolve the glue, a special product found in Swedish store used for dissolvent of glue residuals from stickers.
 |
 |
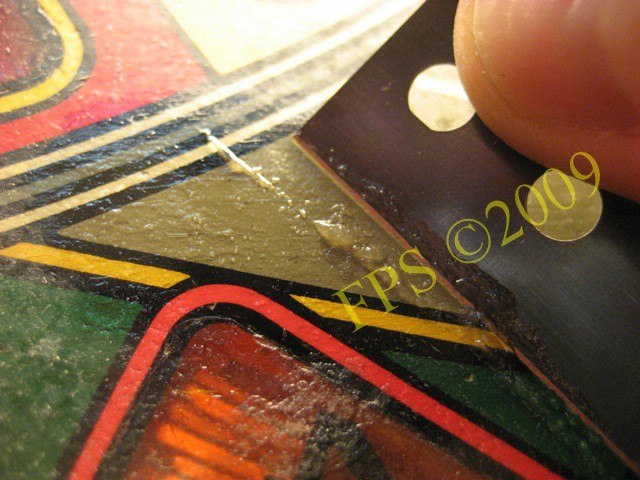
When the glue start to be a sticky paste I peel it of by using a razor blade, layer by layer of glue.
 |
 |
Here we can see glue residuals that I have peeled into a lot and then removed with a piece of cloth.
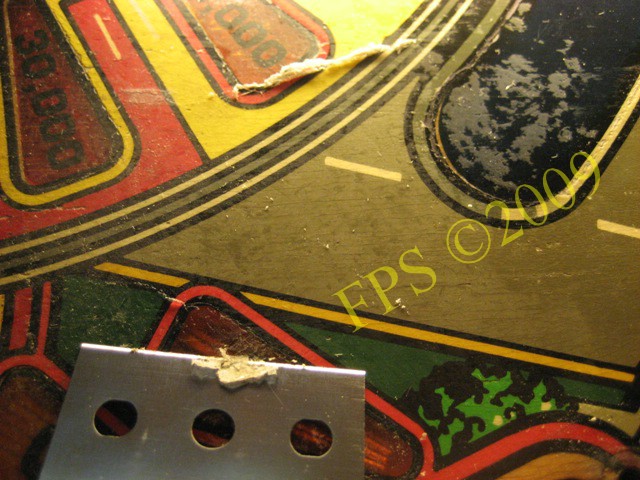
When using the razor blade try to align it as close as possible to the playfield surface to avoid making cut marks in the playfield paint.
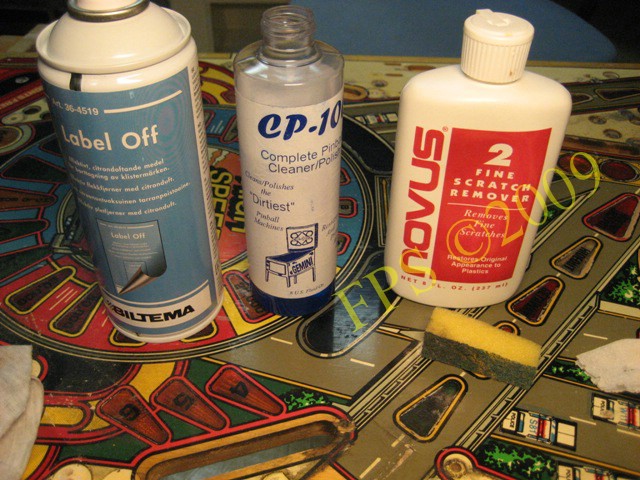
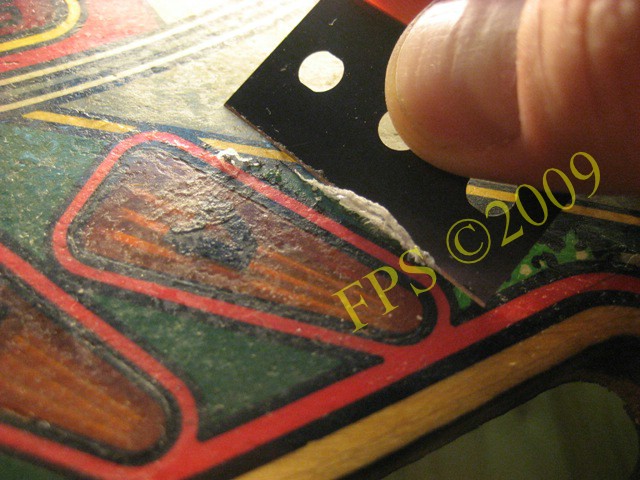
When all glue residuals is removed, it is time to polish the area with Novus 2 and CP-100.

I use a scotch-brite pad to work out the Novus 2 on the surface and afterwards I polish with a piece of cloth. Adjust the pressure when using the scotch-brite pad to avoid scratches in the surface of the playfield.
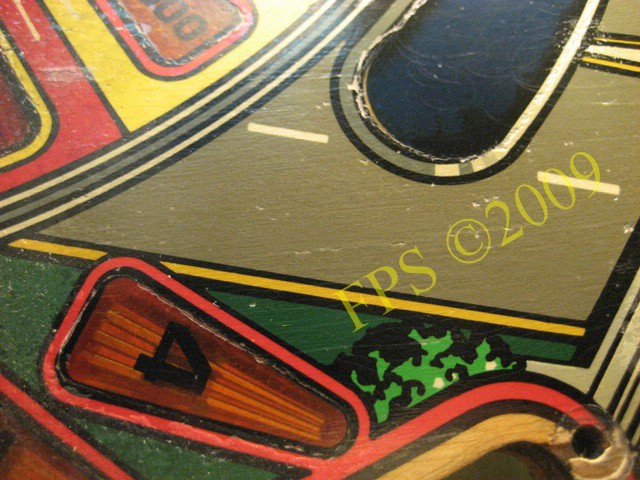
Here is how nice the playfield will become again when all glue residuals is removed. If the glue is lifting off some paint during removal the solution is paint touch-up. After all there is no choice the glue residuals need to be removed.
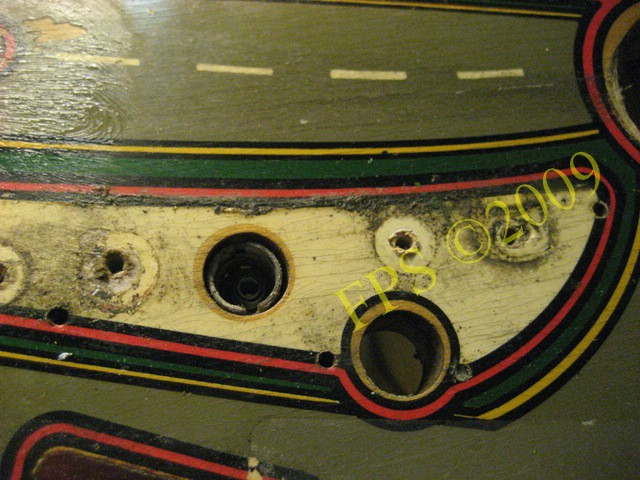
PAINTING AND REFURBISHING OF PLAYFIELD - CLEANING
 |
 |
 |
 |
Cleaning of dirt with Novus 2. The area before and after cleaning.
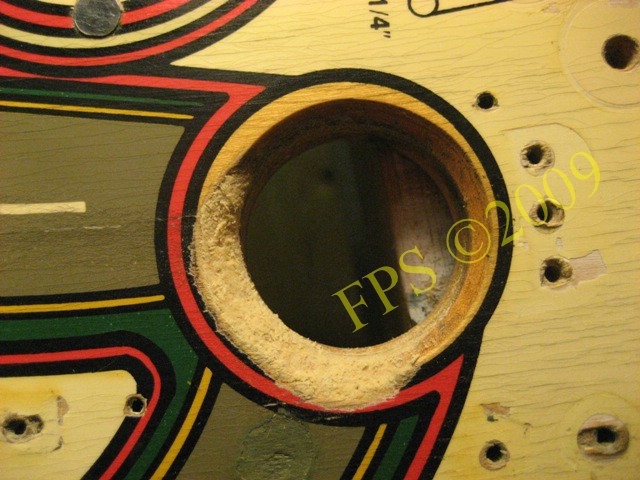
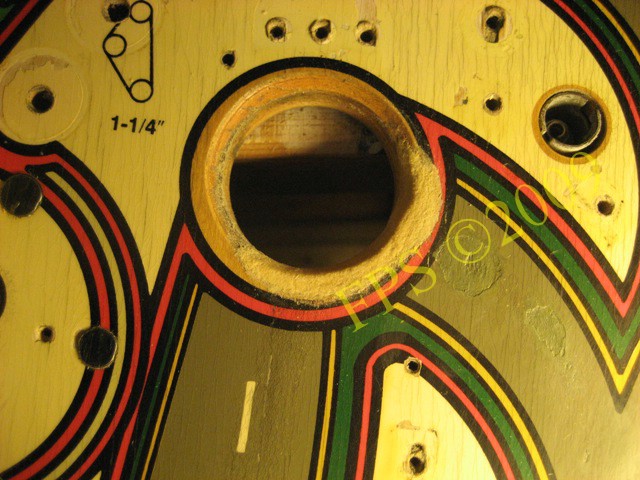
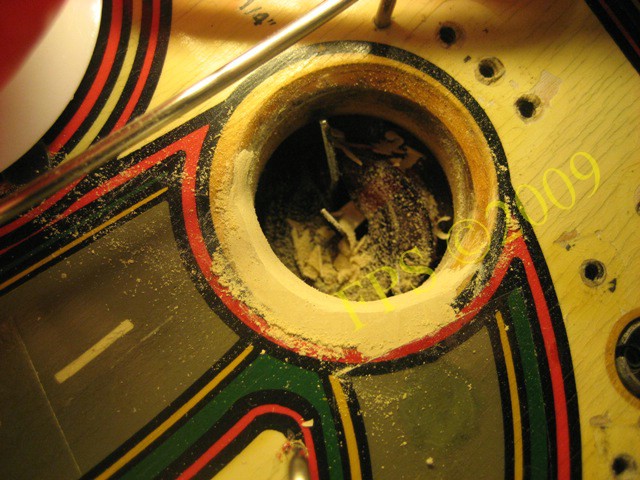
Kick-out hole
The edge of the upper right hole had minor wear from the pinball.
 |
 |
I reshaped the edge with plastic wood (Casco) paste to original form.
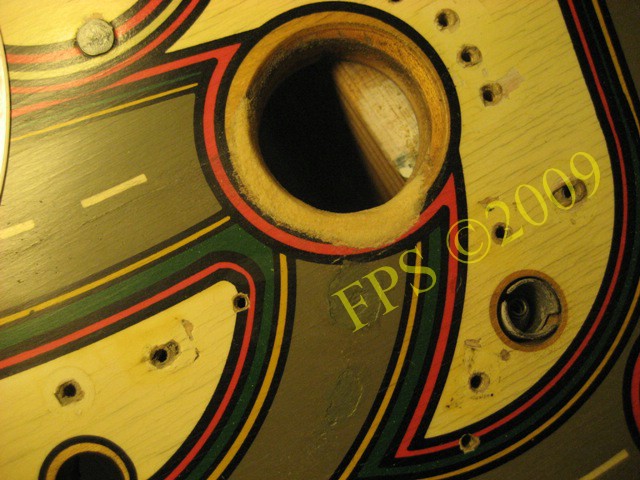
Hole after grinding. Fine sandpaper is used and grind carefully to avoid damage to surrounding painting.
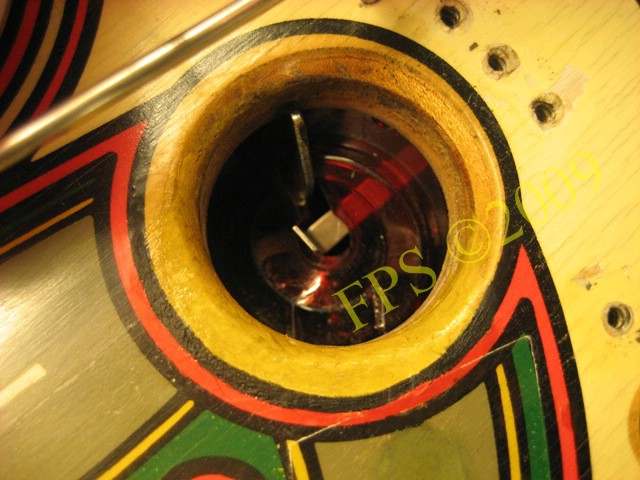
Hole how it looks after painting and varnish.
Unfortunately this repair did not resist the violence/force from the ball and started to come loose from the original wood.
Now I use chemical wood (Plastic Padding) instead to build up the damaged edge of the hole. Chemical wood hardens in 10 minutes at room temperature so you need to work quickly with it. The advantage is that you can build up the damage layer for layer to the original shape. The chemical wood is easy to cut to the desired shape with a razor blade where you can access and then grind with a sandpaper.
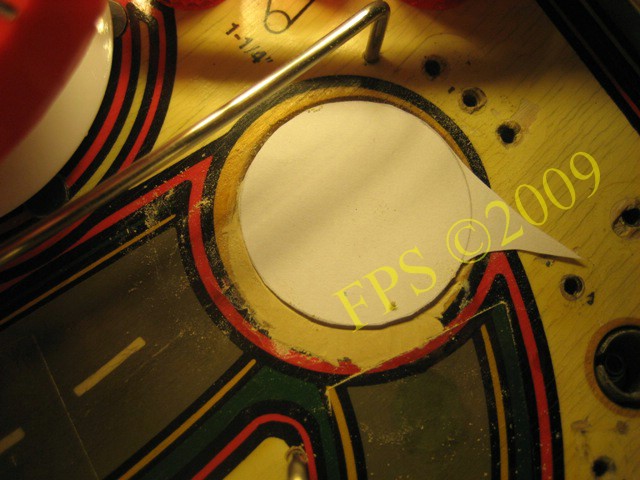
The hole edge has a diameter of 35 mm. I cut out a template in paper and use it as a gauge to achive a circular edge during the grinding.
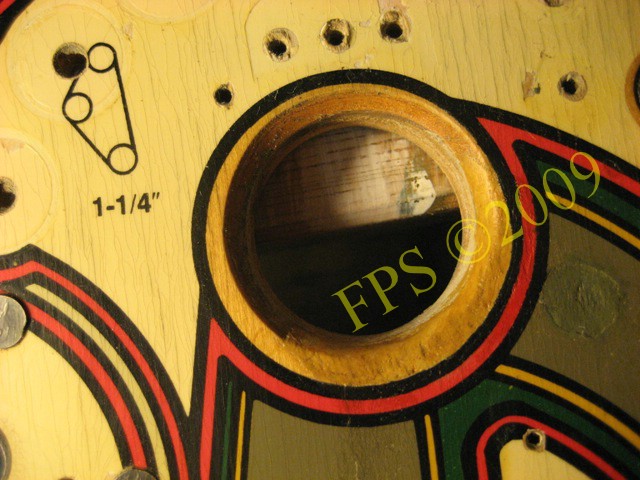
The hole after painting the border lines, acrylic paint of brand Rowney Ivory Black and Cadmium Red and an attempt to mimic wood color, yellowish brown acrylic paint of brand Rembrandt - Yellow Ocher blended with Rowney Gel retarder a medium diluted acrylic paint which make it transparent. Over the yellowish-brown color I apply a lasur containing very little black paint.
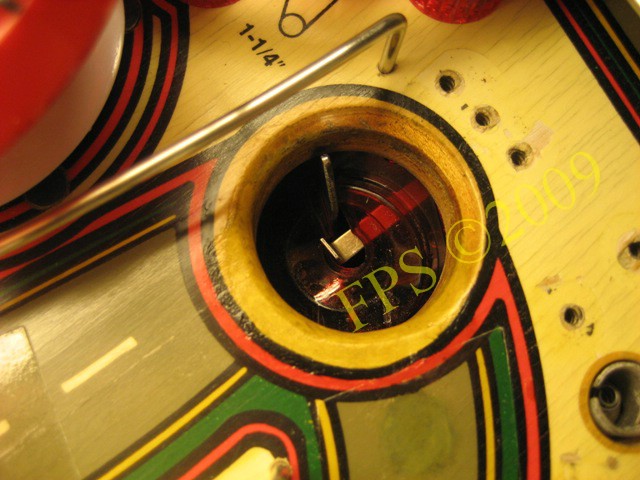
The hole after one layer of floor varnish.

The final result - hole after three layers of floor varnish. Hopefully the edge now will withstand the force from the ball.
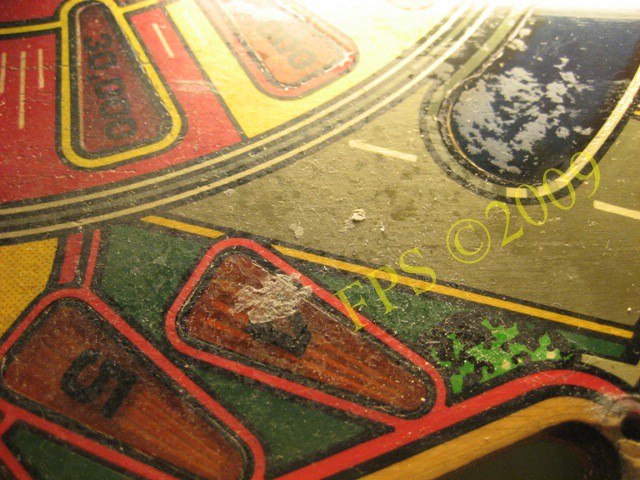
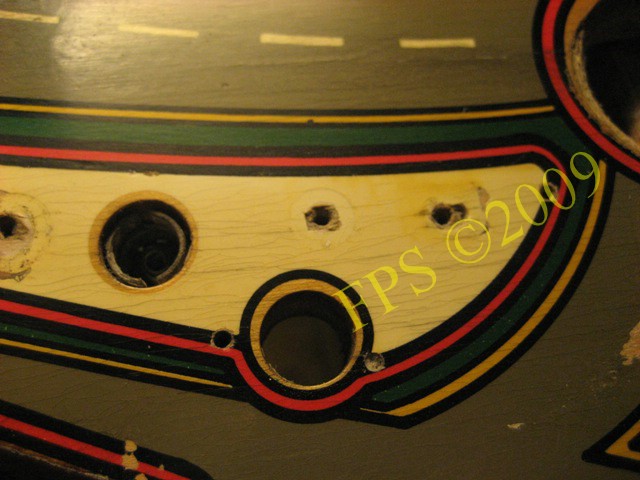
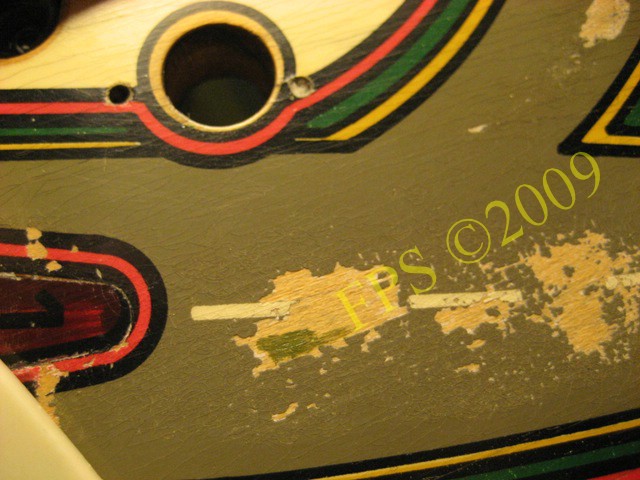
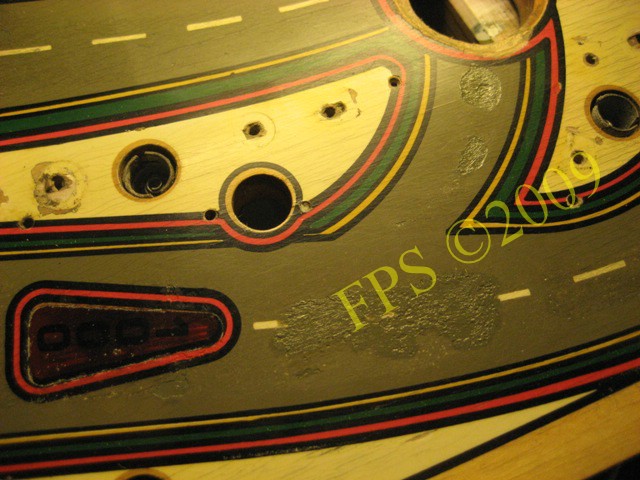
Playfield wear
PAINTING AND REFURBISHING OF PLAYFIELD - PAINT TOUCH-UP
Work with paint touch-ups.
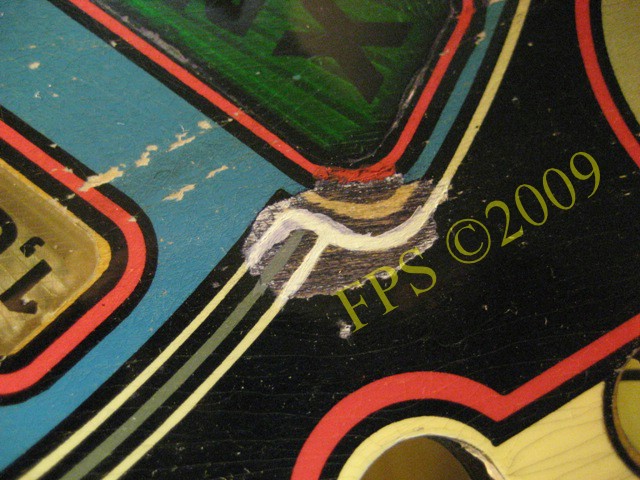
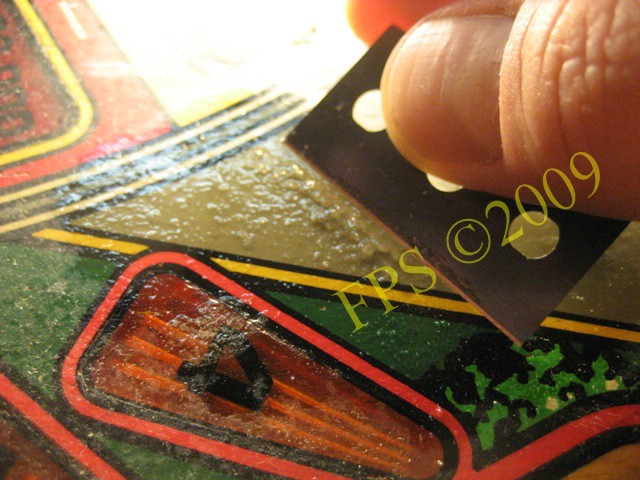
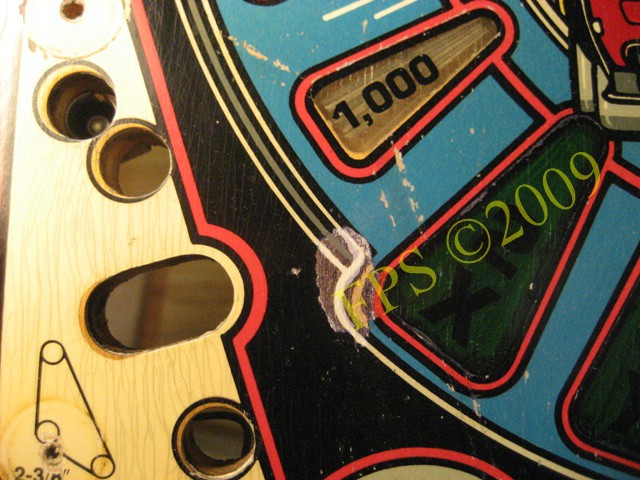
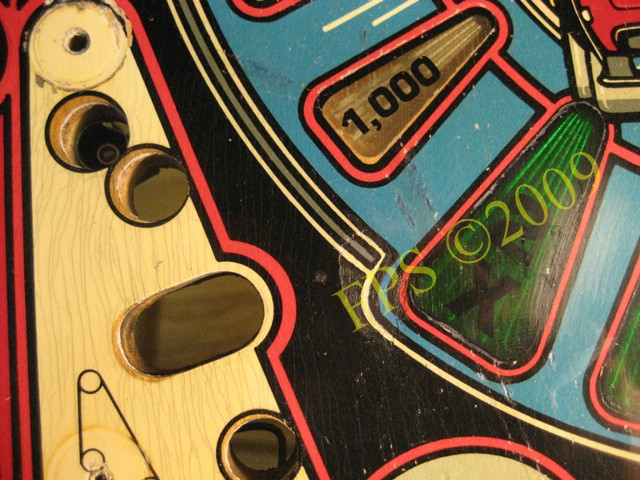
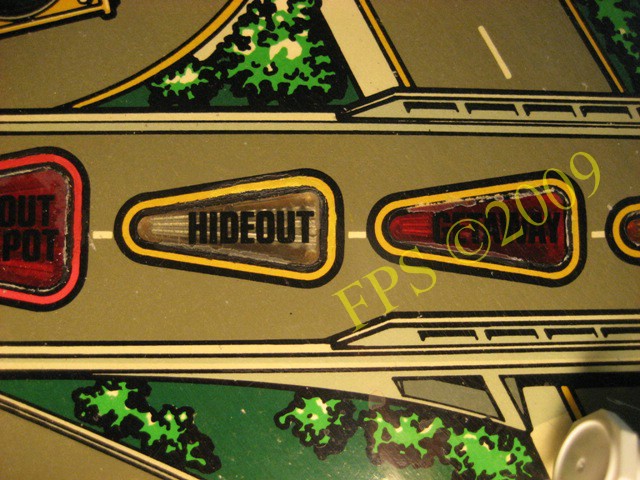
Outside the right slingshot there is a spot with wear. This wear has occurred due to ball drop from the Hide out ramp. I start to paint the white and black contour line with acrylic paint.
 |
 |
Then I paint the grey, black and blue areas with acrylic paint in a shade as close as possible to the original paint. When I feel satisfied with the shade of the color I close the damaged area with 3 layer of floor varnish or so many layers that a even surface is achieved. In this case a protective piece of mylar will be applied over the paint touch-up since this is the area around the slingshot and a lot of ball action often will take place here.
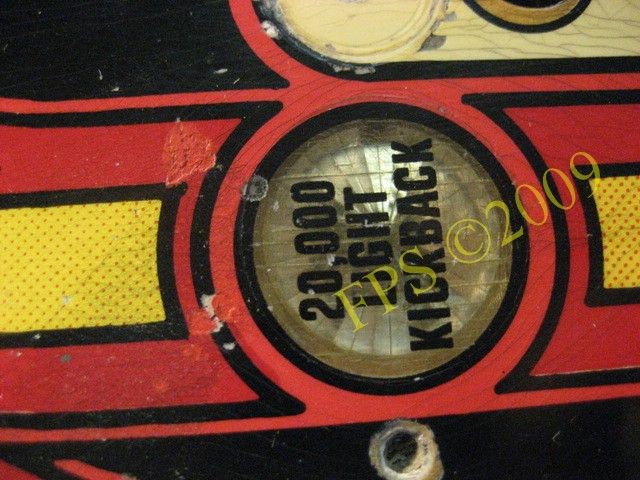
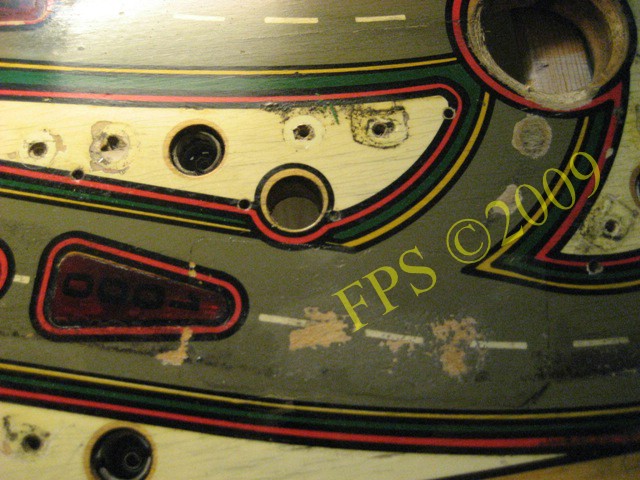
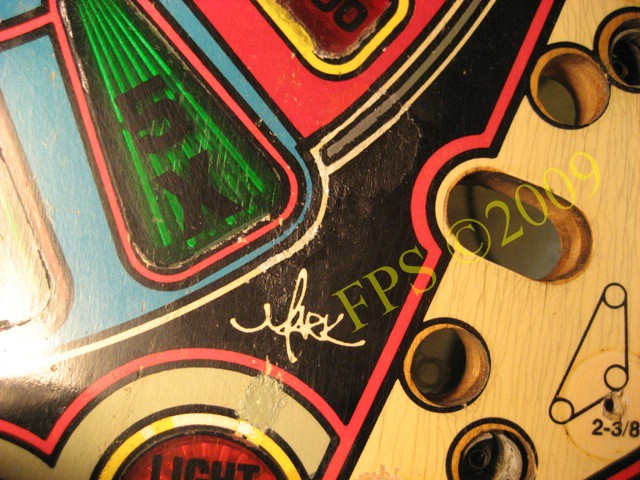
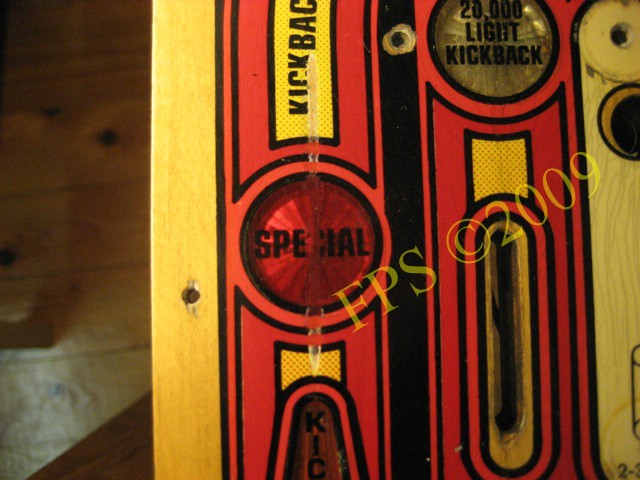
Paint touch-up around 20.000 Light Kickback insert.
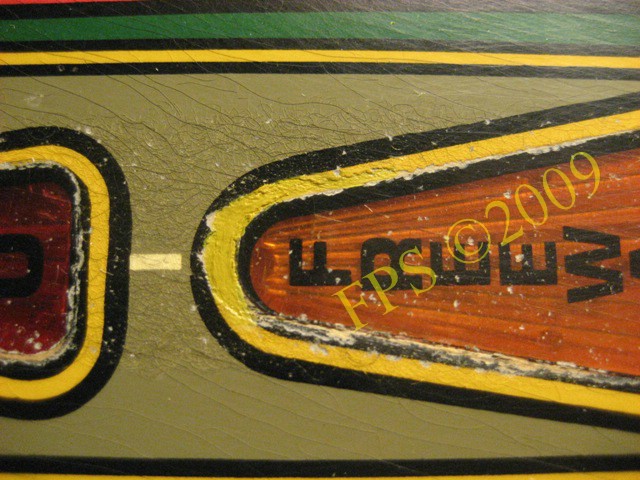
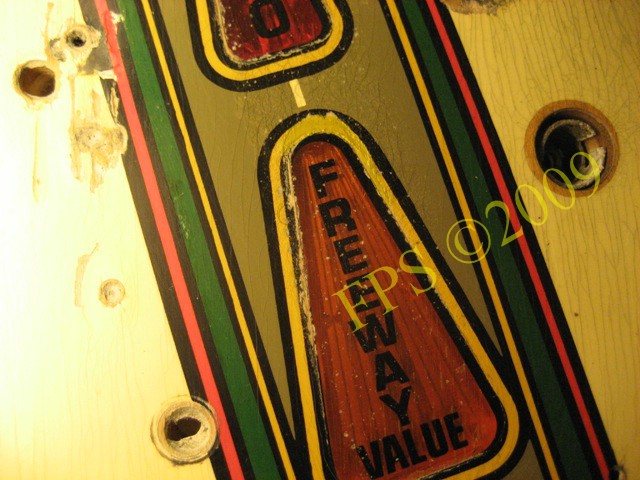
Paint touch-up around Freeway insert, middle part of playfield.
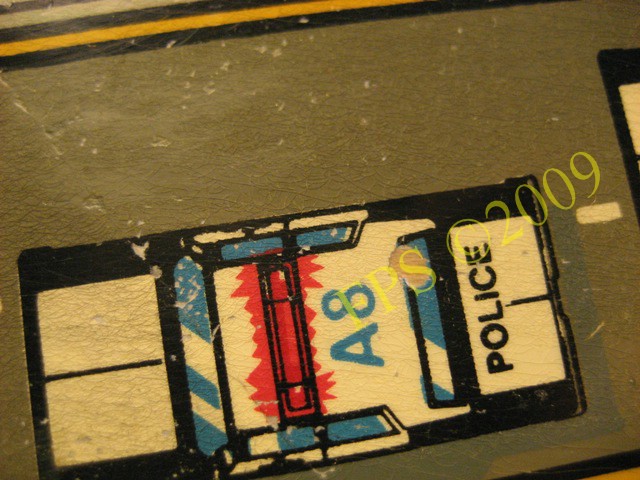
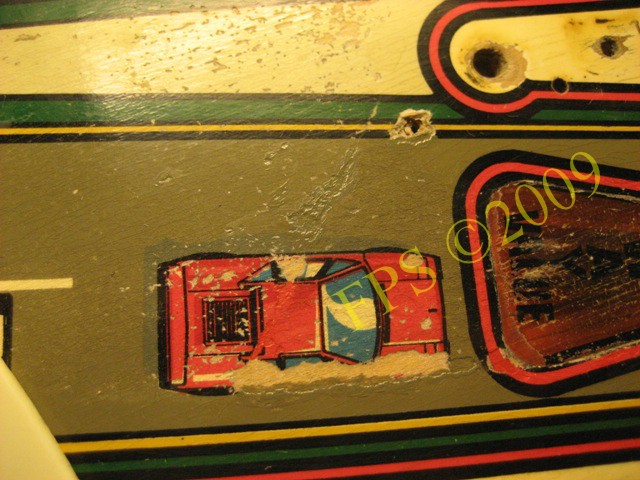
Paint touch-up will be done on the police cars situated on the Freeway lanes.
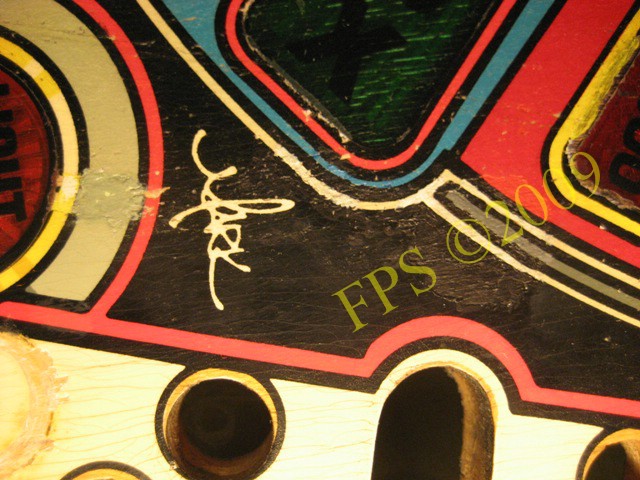
A damage in the playfield where the post for center plastic will be attached is fixed.
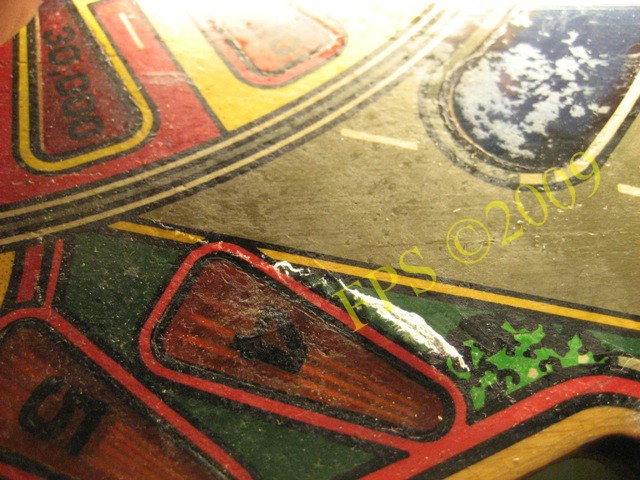
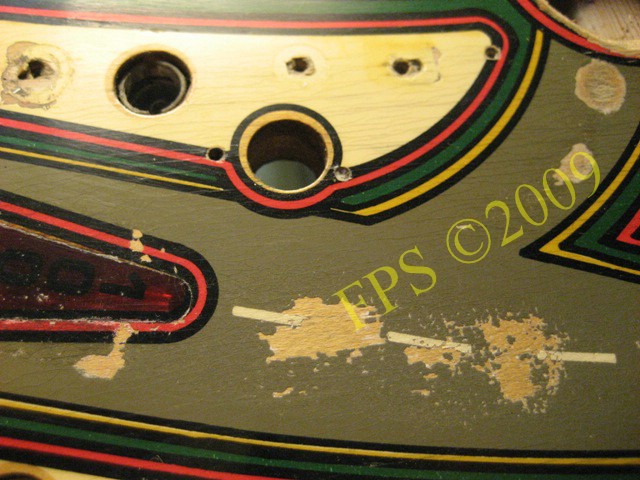
Also the left side area in front of the slingshot has a spot of wear in the playfield after ball drop from Hide out ramp. This is due to the original mylar has been removed once in a time and not a new mylar has been applied.
It was hard to achieve the correct shade of the blue color, but after many times of mixing colors I found a shade that I was satisfied with.
Wear on the out lane.
 |
 |
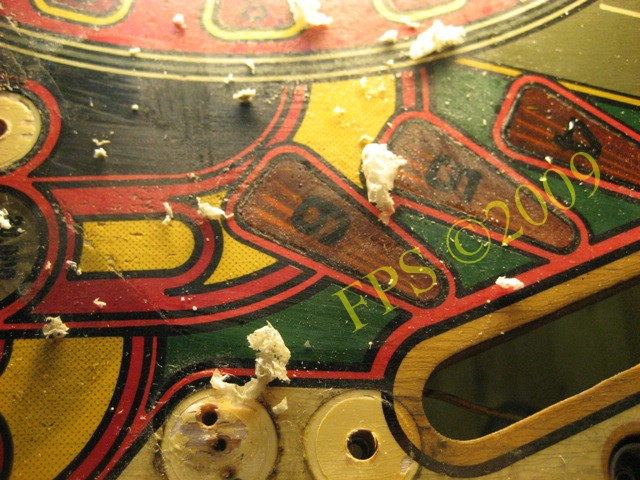
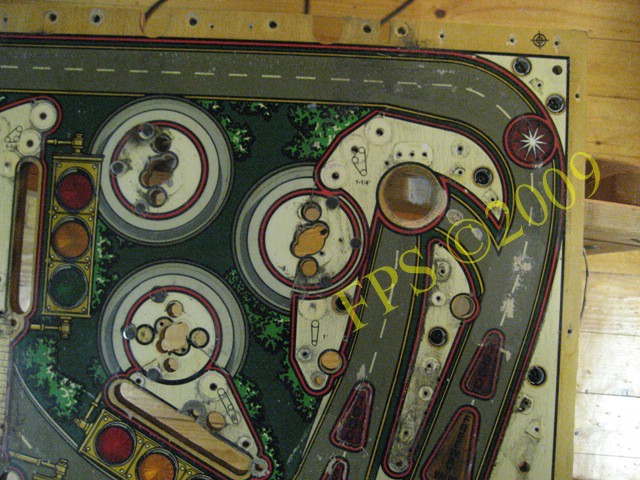
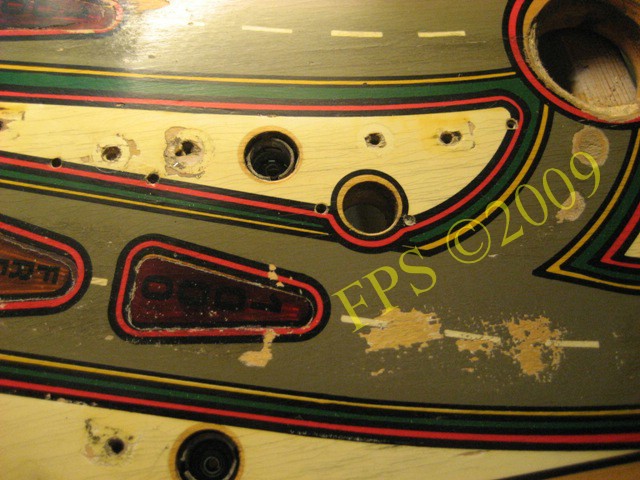
Several minor areas with playfield wear around inserts.
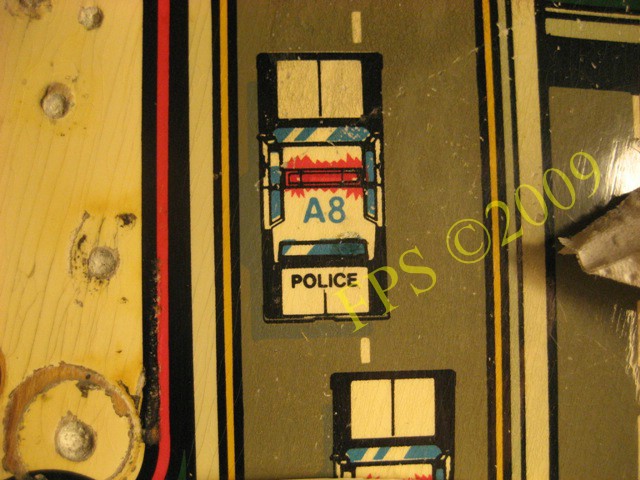
Paint touch-up of police car.
Color matching to find correct paint and shade before painting.
 |
 |
Paint touch-up of wear on the Freeway lane. To get correct shade of the olive green paint was rather tricky - it always went out to be too dark but I do not think this will be visible since the areas is quite high up on the playfield and hidden by playfield details. This wear is from ball drop from the ramp and that the surface has not been protective by mylar. Varnish and mylar will be applied after paint touch-up.
 |
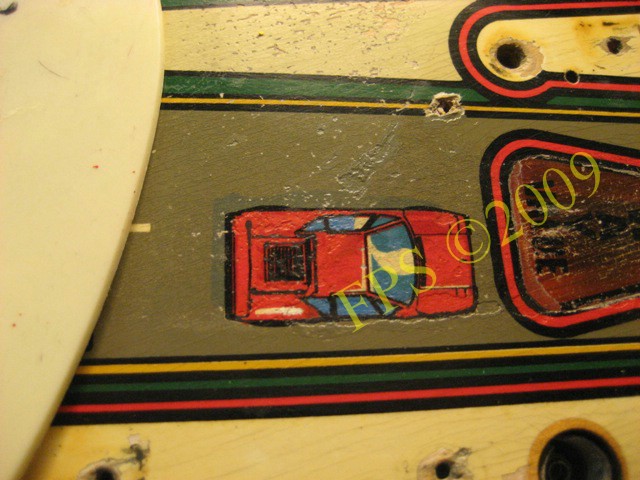 |
"Ferrari" after paint touch-up - the result went out good.
Freeway value
PAINTING AND REFURBISHING OF PLAYFIELD - INSERT
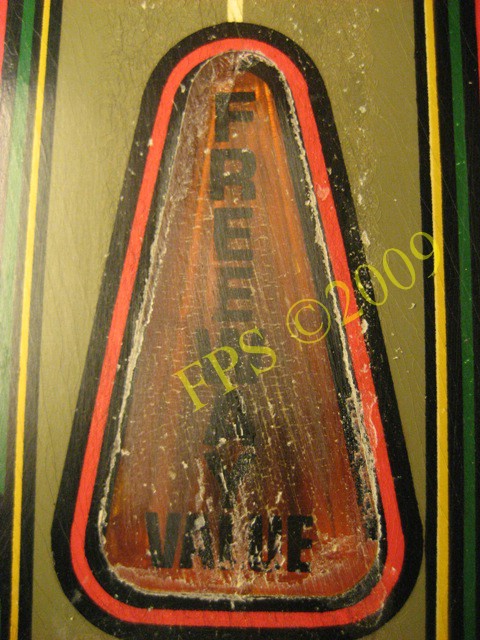
Insert Freeway value on the right lane has also wear. Since I had a set of new insert decals for Willaims High Speed I decided to make a attempt to remove the text on the insert.
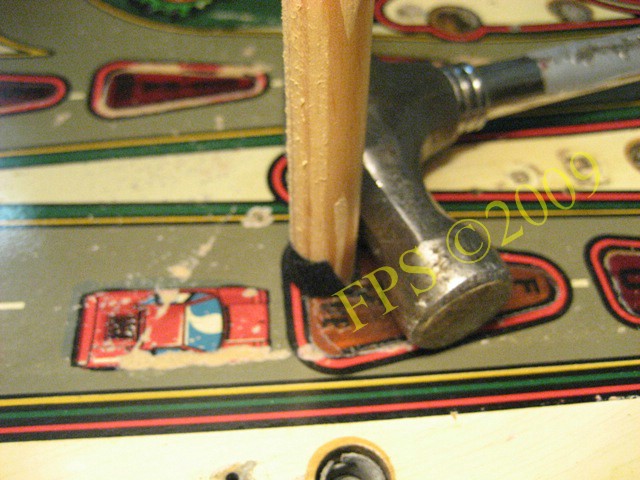
The insert has raised above the playfield surface and to get it in the same level again I use a piece of round molding in wood and tap it down carefully. In the end of the wood I have put a piece of felt to not do any damage of the inserts surface. If the insert is leveled underneath the playfield surface I tap it from the other side of the playfield - be carefully if the inserts painted borderline will start to come loose.
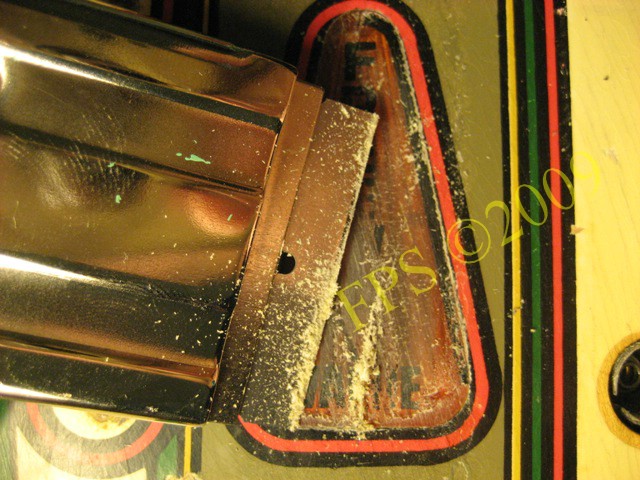
To remove the present text/insert decal I peel the surface of the insert with a razor blade. This is a time consuming work and has to be done carefully to avoid cuts in the inserts surface or damage to surrounding areas.

To smoothen the insert surface after the use of the razor blade I grind the surface gently with fine sandpaper, P240 and P1200 grit.
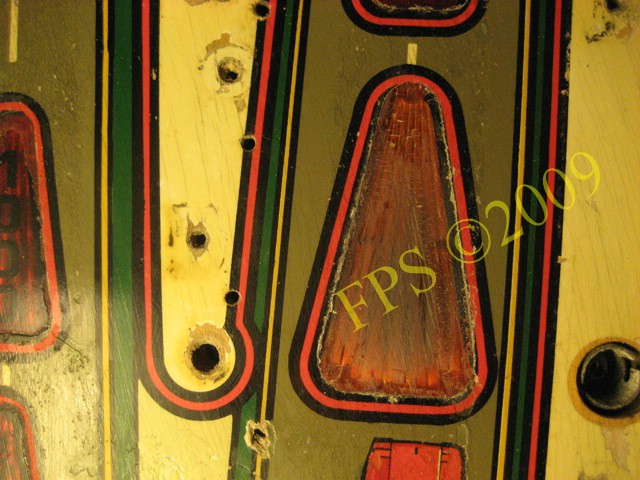
Now the complete text/insert decal is removed.
Afterwards I polish the surface with Novus 2 and CP-100 and the black and red contour line is touch-up with paint. Now the insert is ready for the new decal.
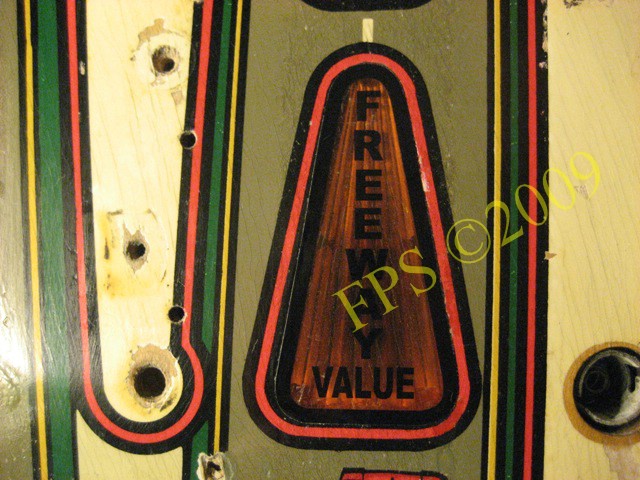
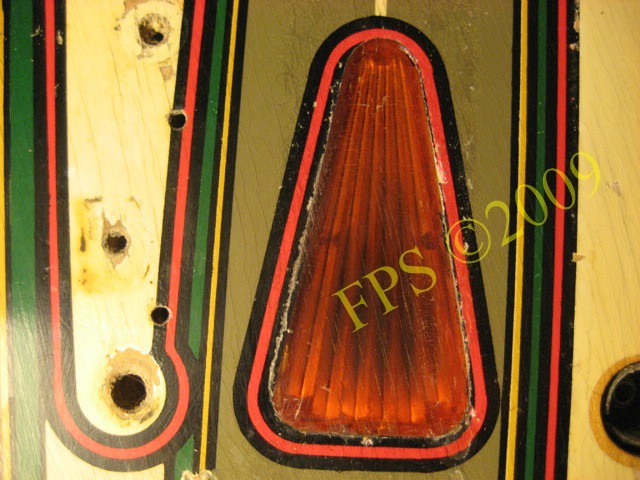
Here is the finished result with a new insert decal applied - Freeway value.
Pleasure and Pinball
© FPS. All right reserved. |
Page Last updated:
2009-03-10 |